
There’s no time like now to check your backups. In fact we’re going to steal the phrase of the season and say;
“Check your backups twice, find out if they’re naughty or nice!”
Here’s how;
Not using CloudPockets for your backups? Try us now with a Free Trial.

Check Your Backups Once
The first check is automated reporting. Our backup platform based on Acronis can send you automated status reports after every backup.
In the Acronis Management console go to Company Management and click on the name of the person to receive the reports. A new menu opens up on the right and in the Settings section click the edit icon.

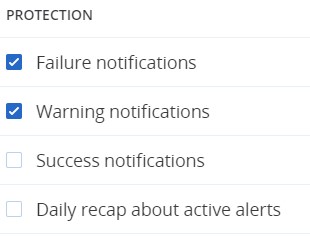
In the Protection section click to enable the reports you want to receive. You can select Failure, Warning, and Success reports. We usually just select Failure and Warning so that if we don’t recieve a report we know the backup was a success. This helps keep our mailbox a little cleaner, but you choose what works best for you. You can also select a Daily Recap if you want more details.
You can, of course, change these settings at any time.
Be sure to select Done and Save when you are finished.
You now have the first piece in place so that you can check your backup after every backup run. Try it right away by selecting to run a backup Now, or wait until the next backup run.
Check Your Backups Twice
The second check is to perform a file restore. It’s great that your backup completed successfully, but can you actually restore a file?
There’s two good reasons to do this:
- Know the restore process before you need it. Crisis mode is not the time to figure this out!
- Unless you can actually restore a file your backup is not working.
Here’s how to restore a backup.
In the Acronis Management console go to your Devices. Pick the device you want to restore from; this could be a physical computer, server, VM, or cloud based backup such as Microsoft 365, to name a few.
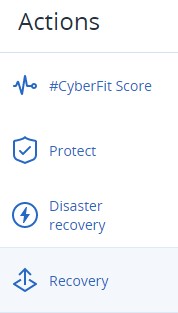
When you click on the device a menu opens up on the right-hand side with the option for Recovery.
Under the Recovery option you can choose what date/time to recover from, then click Recover Files/Folders.

You will likely be asked for your recovery password. You cannot recover files without this password that you set when you created the backup. This password is critical and should always be kept secure.
You can now drill down your folder structure to pick a file you want to recovery. A good practice would be to not pick the same file every time to test a recovery.
Click the checkbox beside the file you want to recover and a menu shows up on the right.
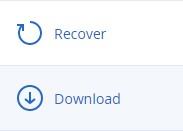
For recovery puposed you likely don’t want to restore this file back to its original location. I suggest you select Download and save this file to your local computer.
You can then open the file to ensure it is valid and not corrupted in any way. You may also want to check with the originator of the file to ensure it is the right copy and right version of the file.
Nice? or Naughty?

Hopefully both of these checks were successful and you now have the peace of mind knowing your backups are valid and recoverable!
If not now is the time to resolve this issue. You don’t want to run into problems when a disaster has occurred and everyone is counting on you.
How often should you do this?
We recommend you recheck your backups every quarter at the very least.
Check your backups! They are a critical piece of your disaster recovery and business continuity.
If you’ve checked twice you’re good to go – go have fun and enjoy this Christmas period!